

How to troubleshoot a Flecker 3900NXT control valve
2025-03-10 10:00
Troubleshooting method for the FLECKER 3900NXT control valve, Chinese operation manual for the FLECKER 3200NXT controller, how to configure the parameters of FLECKER control valves? Analysis and solutions for malfunctions of the FLECKER multi-port control valve in water softening equipment.
Troubleshooting method for the FLECKER 3900NXT control valve, Chinese operation manual for the FLECKER 3200NXT controller, how to configure the parameters of FLECKER control valves? Analysis and solutions for malfunctions of the FLECKER multiport control valve in water softening equipment.
American FLECKER control valves are divided into two types depending on their application methods: electronic and mechanical. With the constant development of market demand, the electronic type, known for its measurement accuracy, has gradually replaced most mechanical types. However, in recent years, our company has often encountered users who have experienced problems managing the control interface. To solve these problems, ChiMei, with more than ten years of experience, will explain "How to debug the imported FLECKER 3200NXT control valve?"
Overview of the FLECKER 3900NXT control valve
The FLECKER 3200NXT is an important component of multiport control valves, equipped with an interface display, adjustable PLC microcomputer. It is compatible with FLECKER multiport valves such as 2750, 2850, 2900, 3150, and 3900. When setting parameters for each compatible multiport control valve, adjustment must be made according to the valve model, and parameter values can be adjusted according to user requirements. This electronic multiport control valve can display numbers, flow rate, and time required for regeneration programs. Compared to mechanical valve bodies, it provides more stable operation, convenient and reliable operation, and accurate counting. It can also be equipped with remote devices depending on user needs.
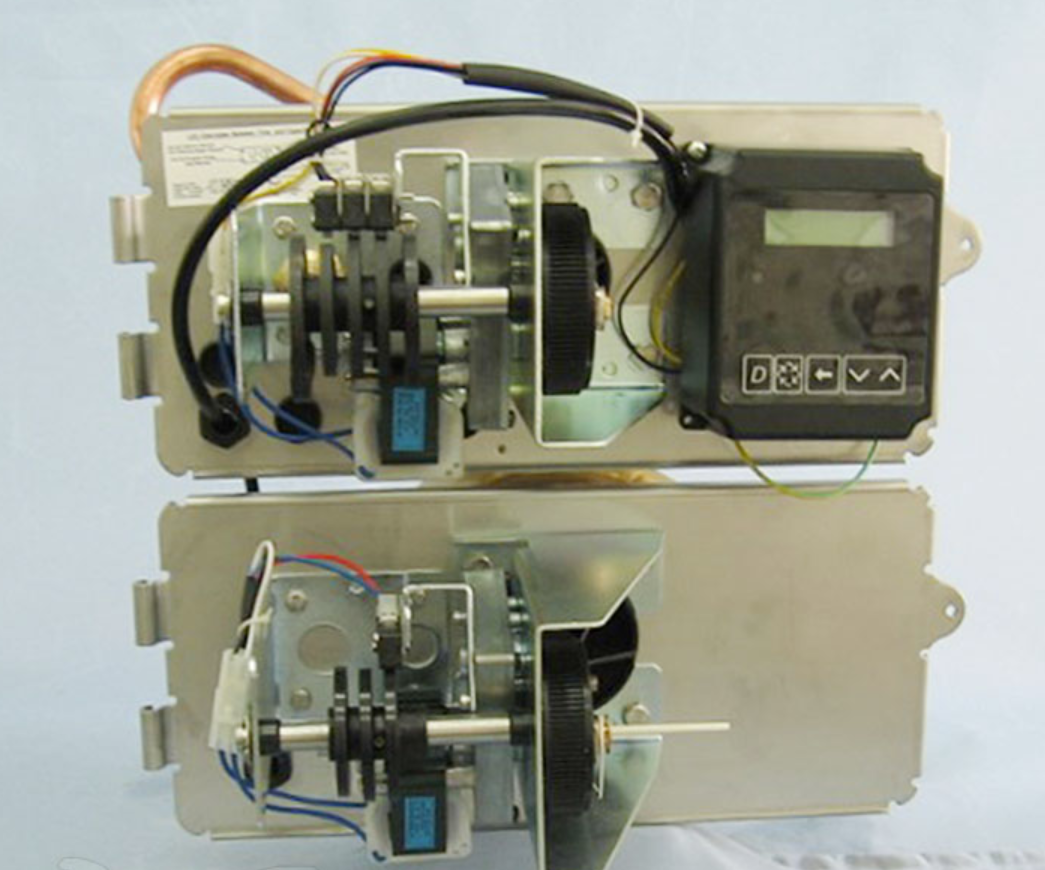
Methods for setting up and debugging the FLECKER 3200NXT controller
1. Setting the current time
Note: The time setting for the main and auxiliary valves should be within 10 seconds of the standard time.
Press and hold the up or down key for 2 seconds.
Press the move key to select the digit you want to change.
Use the up or down key to adjust the digit.
Press the cycle key to return to the normal display, or wait 5 seconds for automatic exit.
Note: Pressing the "D" key (diagnostic key) will exit without saving changes.
2. Manual regeneration start
When the panel is in operation, press and hold the cycle key for 5 seconds.
The panel will proceed to regeneration step 1, and the time for this step will be displayed.
Press the cycle key once to proceed to regeneration step 2.
Press the cycle key once to proceed to regeneration step 3.
Press the cycle key once to proceed to regeneration step 4.
Press the cycle key once to proceed to regeneration step 5.
Press the cycle key once to return to the normal operating state.
Note: Pressing the cycle key for less than 5 seconds can clear manually initiated or queued regenerations. Queued regenerations can only be cleared by manually starting regenerations one by one. Any regeneration initiated before a queued delayed regeneration will cancel the original queued regeneration. Pressing the cycle key during regeneration will advance the regeneration step.
3. Panel operation during programming
When the panel is not in the regeneration state, it will remain in standby mode or the normal work program for a long time. In programming mode, the control panel continuously monitors water flow. The control panel program is saved permanently.
Operation during power failure: All programs are saved permanently. The current valve state, time for each step, and current time will be saved during power failure and restored after power is restored. The current time will be saved if the power failure does not exceed 12 hours.
Note: The current time on the main control screen will blink for 5 minutes after a power failure. Press any key to stop the blinking.
4. Lock control
The control panel will not allow the unit or system to enter regeneration mode until the regeneration lock signal is removed. It is recommended that the lock line between units be 20 to 500 feet long.
5. Regeneration proxy date function
If the proxy date option is enabled and the valve reaches the set regeneration date, the regeneration program will start if no other valve is in the regeneration state. If another valve is in the regeneration state, this regeneration signal will be queued. This function does not take into account whether the remaining water production has reached zero.
6. Entering the control program setting mode
Press and hold the up key and the move key simultaneously for 5 seconds.
Set the time to 12:01 PM or 12:01 HR, then press and hold the up and down keys simultaneously for 5 seconds.
7. Exiting the control program setting mode
- Press the cycle key several times until all parameters are displayed and the screen returns to normal.
- To exit without saving changes, press the "D" key.
Note: In the program setting mode, if no key is pressed or power is lost for 5 minutes, the parameters will not be set, and the device will return to the main display.
8. Reset
- Partial reset:
Press and hold the up and down keys simultaneously for more than 25 seconds until 12:00 PM or 12:00 HR is displayed. All parameters except the flow meter will be cleared.
- Full reset:
Press the movement key when powering on. This will reset all parameters.



Shanghai ChiMay Tech ltd.
Address:
Block 8, No 8188, DaYe Road, Fengxian District, Shanghai, 201409, China
Telephone:
+86 13817226169
WhatsApp:
+86 13817226169
Email:
Subscribe to our newsletter
Want to stay up to date with news and updates about our product? Subscribe.